
Table of Contents
Imagine having a delicious dessert ready in under 20 minutes, with minimal effort and ingredients. This is exactly what the easy Oreo balls recipe offers. It’s a quick and delicious no-bake treat that can be made in no time. You can satisfy your sweet tooth with these bite-sized oreo balls, perfect for anyone looking for a fast and easy dessert solution.
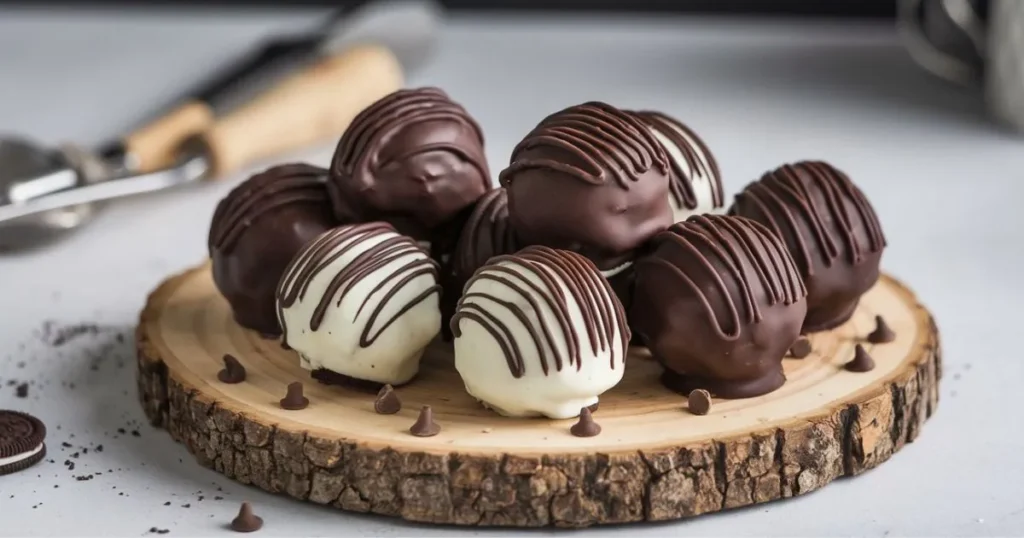
A delectable arrangement of freshly rolled, no-bake Oreo balls, nestled on a wooden surface with a soft, natural lighting illuminating their dark chocolate coating and contrasting white interiors. The balls are positioned in the foreground, capturing the viewer’s attention, while the background features a simple, minimalist setting to highlight the scrumptious treats. The image conveys a sense of simplicity, homemade charm, and the enticing allure of this effortless, 20-minute dessert.
This easy recipe is a great way to enjoy no-bake oreo balls without spending hours in the kitchen. With this recipe, you can create delicious oreo balls in just a few minutes. It’s perfect for any occasion. Whether you’re looking for a quick dessert or a fun treat to make with your family.
Why These No-Bake Oreo Balls Will Become Your Go-To Dessert
Oreo balls in 20 minutes are a quick and easy dessert solution. They’re perfect for any event, big or small. Whether it’s a party or just a sweet craving.
This recipe is simple, needing just a few ingredients. You won’t find a long list of hard-to-find items. With simple ingredients, you can whip up a dessert that’s both impressive and tasty. Plus, you can make quick oreo balls in just 20 minutes, ideal for sudden dessert needs.
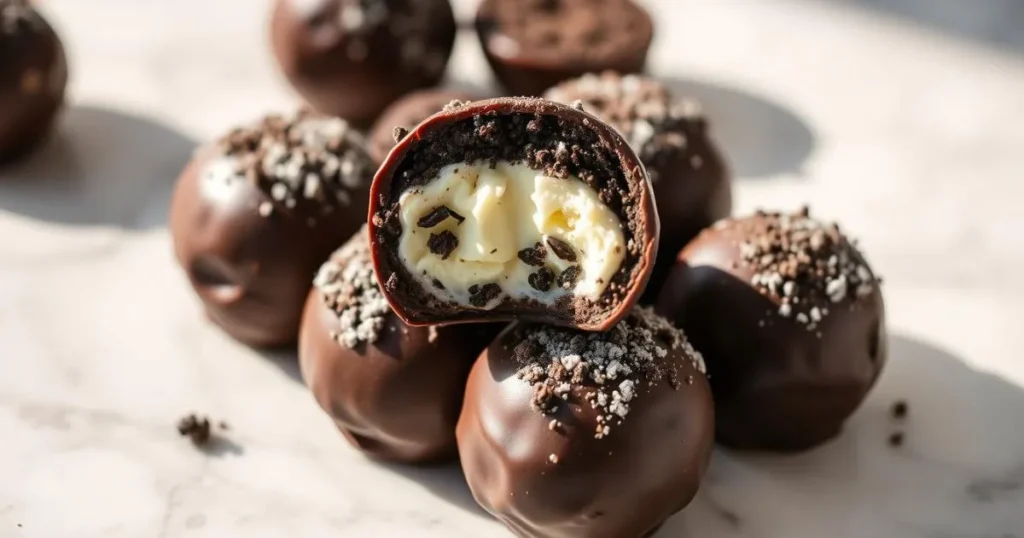
A decadent close-up of freshly made Oreo balls, their dark chocolate exteriors shimmering under soft, warm lighting. The creamy, white centers peek out invitingly, dusted with a light coating of crushed Oreo crumbs. The balls are arranged artfully on a pristine, marble-like surface, casting shadows that add depth and dimension. The overall scene exudes an air of indulgence and effortless sophistication, perfectly capturing the appeal of this no-bake dessert that can be whipped up in just 20 minutes.
- Easy to make: The process is simple and straightforward, making it easy for anyone to follow.
- Quick: You can make these oreo balls in just 20 minutes, making them perfect for last-minute needs.
- Delicious: The combination of oreos and cream cheese is a match made in heaven, creating a rich and decadent flavor.
These no-bake oreo balls are a fantastic addition to any dessert menu. They’re easy, quick, and delicious, making them perfect for any occasion. With the ability to make oreo balls in 20 minutes, you’ll never be without a dessert option again.
Essential Ingredients and Equipment
To make delicious oreo dessert balls, you need a few key ingredients and tools. You’ll need Oreo cookies, cream cheese, and chocolate. Also, a food processor or blender is necessary to crush the Oreos and mix everything.
Choose high-quality Oreos and cream cheese for the best taste. You can pick any chocolate type you like, like milk or dark chocolate. You’ll also need a mixing bowl, a spoon, and a baking sheet lined with parchment paper.
Here is a list of the essential ingredients and equipment you will need:
- Oreo cookies
- Cream cheese
- Chocolate
- Food processor or blender
- Mixing bowl
- Spoon
- Baking sheet lined with parchment paper
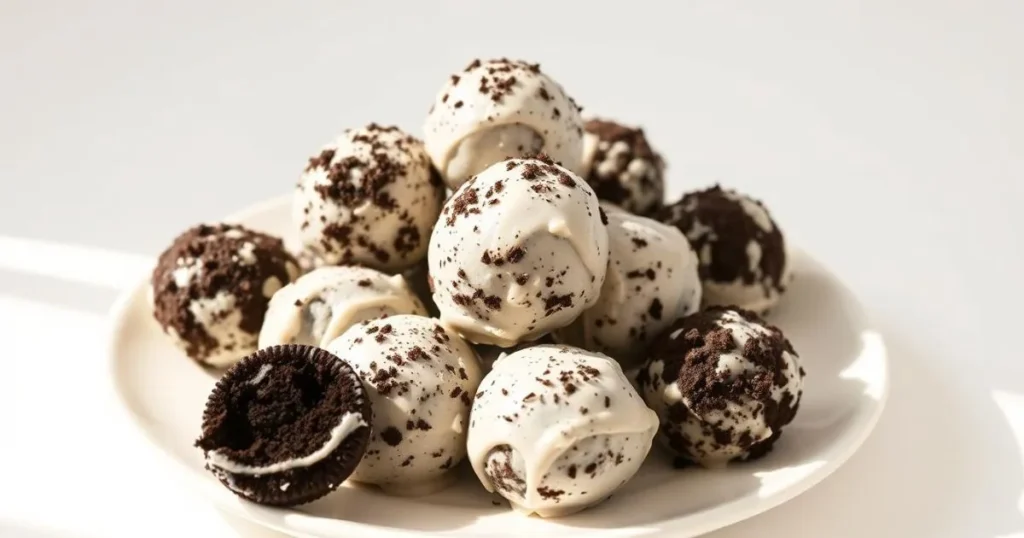
Oreo dessert balls, a delightful no-bake treat with a smooth cream filling encased in crunchy Oreo cookie crumbs. Arranged on a clean white ceramic plate, the balls glisten under soft, diffused lighting that casts gentle shadows, highlighting their spherical shapes. The background is a plain, neutral color, allowing the dessert to be the focal point. The lighting creates a warm, inviting atmosphere, evoking a sense of indulgence and homemade comfort. The Oreo balls are perfectly uniform in size, showcasing the care and precision in their preparation. This image captures the essential ingredients and equipment needed to create this easy, crowd-pleasing dessert.
Make sure you have all the ingredients and tools ready before starting. With these, you can make delicious oreo dessert balls for any event.
Step-by-Step Guide to Making Perfect Oreo Balls
To make perfect oreo balls, follow a simple process. Start by getting your ingredients and tools ready. You’ll need a food processor, a mixing bowl, and a baking sheet with parchment paper. With this easy recipe, you can make tasty treats quickly.
Next, crush the Oreos in a food processor and mix with cream cheese. The mix should be smooth and well mixed. Then, shape the mix into small balls, about 1 inch in diameter.
Shaping and Coating
Shaping your oreo balls is key. Make sure they’re all roughly the same size for even cooking. After shaping, coat them in chocolate. Melt the chocolate in a double boiler or in the microwave in 30-second intervals, stirring each time.
Dip each oreo ball into the melted chocolate, using a fork to fully coat the ball.
Decoration Options
After coating, decorate your oreo dessert balls with your favorite toppings. Popular choices include sprinkles, chopped nuts, and shredded coconut. You can also use colored chocolate or candy melts for different designs. With this easy recipe, you can make a variety of delicious and pretty treats.
Creative Variations and Professional Tips
When making oreo balls for parties, think about creative twists to wow your guests. Try mint or peanut butter flavors for something new and tasty. To speed up the process, use a food processor for the cookies and mix everything in a big bowl.
For an extra wow factor, add different coatings like melted chocolate or chopped nuts. This adds texture and looks great. For instance, coat your oreo balls with white chocolate and sprinkles for a fun look.
Flavor Alternatives
- Mint: Add a few drops of peppermint extract to the cream cheese mixture for a refreshing twist.
- Peanut butter: Mix in a tablespoon of peanut butter with the cream cheese for a nutty flavor.
Troubleshooting Common Issues
If your oreo balls are too crumbly, add more cream cheese. If they’re too sticky, add crushed cookies. With these tips, You’ll create a delicious and visually stunning no-bake treat that everyone will love!
Serving and Storing Your Oreo Balls
Now you know how to make delicious no-bake Oreo balls. It’s time to learn how to serve and store them. You can put them on a platter or in a decorative bowl. This will show off their tempting look.
Try different toppings like crushed Oreos, sprinkles, or melted chocolate. This adds a special touch.
To keep them fresh, store them in an airtight container in the fridge. They can last up to a week. This makes them great for making ahead.
If you want to keep them longer, freeze them. Place them on a baking sheet and freeze until solid. Then, put them in a freezer-safe bag or container. Frozen ones can last up to three months. So, you can enjoy them whenever you want.
FAQ
What are Oreo balls?
Oreo balls are a tasty no-bake dessert. They’re made with crushed Oreo cookies, cream cheese, and chocolate. These bite-sized treats are simple to make and great for any event.
How long does it take to prepare this no-bake treat?
You can whip up Oreo balls in under 20 minutes. This makes them a quick and easy dessert choice.
What ingredients do I need ?
To make Oreo balls, you’ll need Oreo cookies, cream cheese, and chocolate. You can use melted chocolate or chocolate chips. Don’t forget toppings like sprinkles or crushed nuts.
Can I make them ahead of time?
Yes, you can make Oreo balls ahead of time. Store them in the fridge or freezer. They’re perfect for parties or gatherings where you need a quick dessert.
What are some creative variations
Try different Oreo flavors and coatings like white chocolate or colored candy melts. Add unique toppings to create tasty Oreo ball variations.
How do I store them ?
Store Oreo balls in an airtight container in the fridge. You can also freeze them for longer storage. To serve, thaw them in the fridge.
1 thought on “Easy Oreo Balls Recipe: No-Bake Dessert in 20 Minutes”
Comments are closed.